I just finished working at AUT University's School of Art & Design,
so thought I'd better give you a guided tour of their Print Workshop.
This specialist facility for Print is accessible by all Art & Design students at AUT (over 1000 of them!),
but is predominantly used by Graphics (now called Communication Design),
as well as Fashion & Textile Design students, and some from Visual Arts,
ranging from undergraduate to post-graduate.
 |
| Panorama view of AUT Print Workshop from entrance doors, April 2014 L: Office, Prep Island (front), computer, sample drawers, relief & intaglio printing area R: screenprint area (vacuum tables in front) |
The Print Workshops are on the 7th floor (with inner-city views), and consist of 3 separate rooms;
The main large workshop caters for screenprinting as well as relief & intaglio printing.
There is another large workshop space for etching and all the letterpress equipment.
A smaller room across the hall contains lithography workshop.
 |
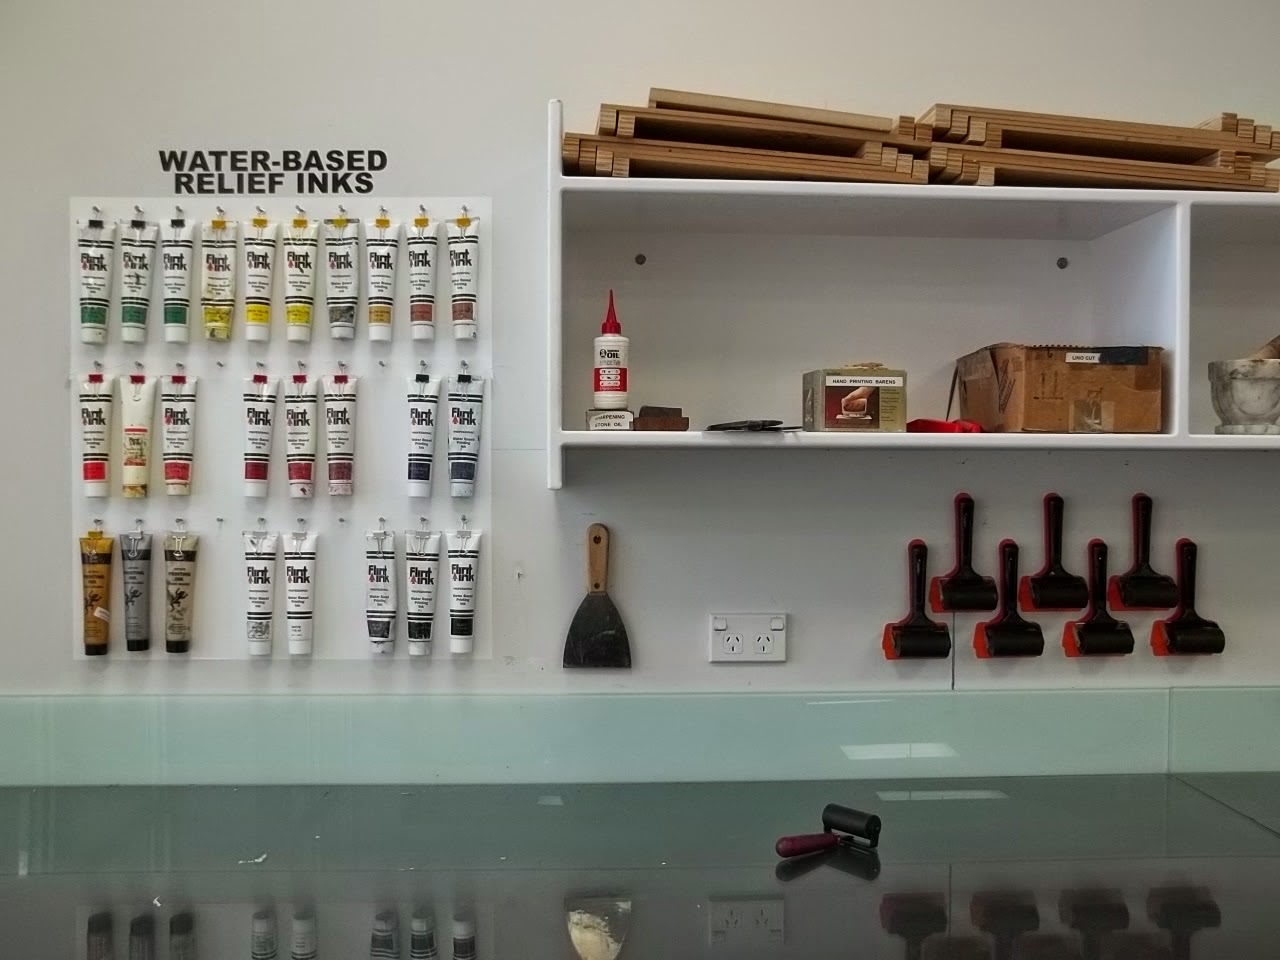
| AUT Print Workshop April 2014: Relief Printing Area |
The Relief & Intaglio Printing Area is half the main studio.
There are 4 glass-top tables 1.2 x 2.4m each & glass-topped benches.
These make cleaning up much easier!
Each table is equipped with a printmaking press and movable drying rack,
so this area can comfortably accommodate up to 16 students when teaching workshops.
There is an 'island' dedicated to paper preparation: storage and cutting.
I used the vinyl cutter to improve signage and make the most of wall space,
such as hanging inks (using coloured clips) and silhouettes of rollers (to easily see what's missing!)


The other half of the main Print Workshop is dedicated to screenprinting.
An additional 4 glass-top tables 1.2 x 2.4m each & glass-topped benches on this side
enables students to work independently on screen processes.
Next to the washout sinks, there is a door that leads to 3 small rooms;
a room for waterblasting and applying screen chemicals,
an exposure room for the UV light and tilt-frame exposure unit,
and a room for applying and drying photo-sensitive screen emulsion.
The photo below shows this space set up for a fabric printing workshop,
with removable padded fabric boards on top of the tables.
This area can also accommodate up to 16 students when teaching workshops.

I also implemented a screenprint ink-mixing area, one side for paper inks, the other for fabric inks.
Plastic spatulas may be stained by dyes, but means less wastage and are cheap to replace (50c each).
Due to limited airflow, preference is given to non-toxic eco-friendly water-based products whenever possible.
For fabric printing, dye concentrates are mixed with a clear water-based print paste to make any colour.
Accurate scales are used to measure recipes, making this much more economical than buying pre-mixed.
There is a 4-colour carousel, which students use mainly for printing t-shirts.
A vinyl cutter and a heat press, used for transfers and heat-press vinyl on t-shirts and textiles.
Hairdryers are stored on the wall to save bench space (I made these holders from recycled tubes!)


AUT Print Workshop has a large selection of squeegees for students to use.
There are 4 of these holders; one rack for polyurethane squeegees, and 3 in various widths for rubber ones.
These holders are useful for storage and drying, as they ensure blades are not dented.
In fact, AUT even has a special squeegee sharpening grinder (sorry I forgot to get a photo of it!)
There are also of these 10 vacuum tables which are ideal for printing artworks or posters on paper.


Here is a simple handy tip for those of you who want to set up a screenprint area at home or school:
Find an old board, benchtop or table top that has a very smooth surface.
Screw or bolt on some screen clamps (permanent or removable)
so the screen doesn't move while you are printing and to help with registration of multiples.
A block of wood with the end cut at 45 degrees will hold your screen up while changing paper.


AUT Print Workshop has 4 of these wash-out units pictured below;
one is in a room for the waterblaster & chemicals,
but there are 3 in the main Printmaking Workshop for cleaning screens and squeegees.
These units have a perspex screen on the front which are hinged to open upwards,
useful for reducing noise and lessening splash-back, which is great for beginners!

In a separate room down the hallway, there is a lithography workshop.
Although not used often, it is well-equipped with 2 large litho presses and stones.

Across the hallway, there is another room which houses both letterpress and etching.
It contains an acid cabinet, paper storage and a soaking sink,
an antique metal guillotine and 2 large etching presses.
AUT Print Workshop also has a Farley and and electric Korrex letterpress machine
There is a selection of metal type for students to learn the art of typesetting,
and exposure unit for making polymer plates for letterpress,
or students can access the laser cutting equipment to cut their own type and/or shapes
(often using 3mm wood or perspex which is adhered to a backing board).


In the hallway there is also this beautiful old press,
which I was told was used to print the first postage stamps in New Zealand!

As you can see, it is a very spacious and well-equipped (and much coveted) printmaking space.
Unfortunately it is not available for public use, and there are no short courses.
Has this made any of you printmakers a little green with envy?!
What do you think???
Comments
:-)