This afternoon we were experimenting with drypoint.
In drypoint the surface of the plate is scratched, gouged, and scraped.
The metal or plastic of the plate is not removed, it is just pushed to the side.
Here examples that may be useful to inspire you to make some interesting drypoints:
Where to start? The plate... I find plexi-plate the cheapest and easiest.
It is usually clear so makes it easy to trace outlines from photos.
It's main disadvantage is that it doesn't hold plate tone well, so ink generously.
Metal plates such as aluminium, copper or zinc do hold plate tone
and the advantage of these is that it can be used in conjunction with other etching processes.
Consider the shape of image and plate - square, elongated, round, custom shape?
.jpg) |
| Alexis Neal, Nga Rakau a Tu, 2012 Relief etching, 30x25cm, edition of 20 |
 |
| Gabrielle Belz, Rushing Into Our Dreams, 2008 Drypoint, 44x60cm, edition of 20 |
 |
| Vanessa Edwards, Shame They Can't Change Their Spots, 2009 Drypoint and monoprint, 42x27cm |
Consider how the image sits on the plate and the paper -
is it centered, to one side, top, bottom, to the edge of the plate?
Over edge of paper?
 |
| Graham Hall, Creation Myth, 2011 Drypoint, 30x30cm, edition of 20 |
 |
| Ben Reid, Time in the Sun - Chatham Island Shag, 2009 Drypoint, 31x57cm, edition of 8 |
It doesn't have to be black...
Think about inking up your plates with a hint of colour.
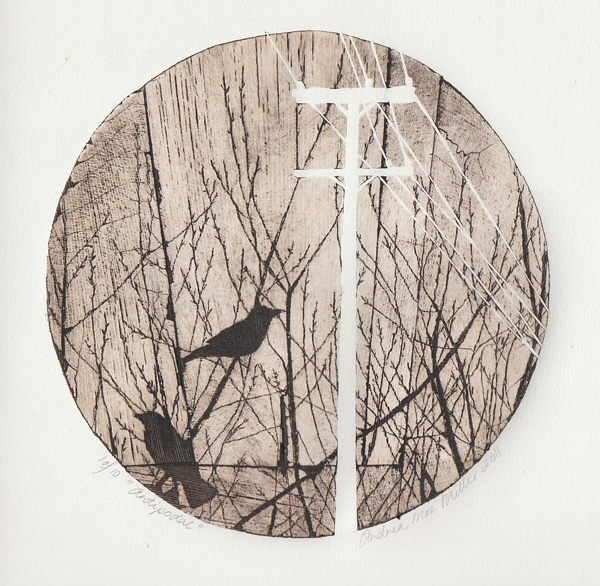 |
| Andrea Mae Miller, Antipodal, 2011 Bamboo etching, 21x22cm, edition of 10 |
 |
| Graham Hall, Prussian Blue, 2010 Drypoint, 39x27cm, edition of 10 |
Or consider printing with multiple colours...
 |
| minu, Afternoon Tea No. 8 - The Otter, 2011 Drypoint, 19x27cm, edition of 15 |
 |
| Struan Hamilton, Untitled Drypoint, 60x80cm |
Ben Reid combines dryprint with woodblock,
sometimes as a tone or pattern for background or as an embossed texture.
 |
| Ben Reid, Hihi, 2007 (Close-up) Drypoint with emboss, 50x36cm, edition of 6 |
Comments